7 Water Damage Restoration Timeline Stages Explained
Last Updated: November 2, 2026
Quick Summary
A water damage restoration timeline usually runs from a few days to several weeks, depending on how much water got in and what it soaked into. Mitigation, which stops the damage and dries the structure, is typically short, while reconstruction takes longer. Fast water removal is the biggest factor you control.
- Water sitting 24 to 48 hours soaks deeper into materials, adding removal and drying time.
- Drying is complete when moisture readings match dry reference points, not when the room feels dry.
- Mitigation and reconstruction run on two separate clocks, so plan for both.
- Insurance claim review can run separately from drying and add days or weeks before repairs.
- Ask your restoration provider for a written schedule showing each phase and what could change it.
Table of Contents
- How Long Water Damage Restoration Takes Overall
- Step 1: Emergency Response and Stopping the Water Source
- Step 2: Initial Inspection, Damage Assessment and Moisture Mapping
- Step 3: Water Extraction, Cleaning and Structural Drying
- How Drying Completion Is Measured
- Step 4: Material Removal, Repairs and Reconstruction Timelines
- When Mold Enters the Timeline: Mold Remediation Scheduling
- Factors That Lengthen or Shorten the Restoration Timeline
- Planning Your Restoration Schedule and Next Steps
- Frequently Asked Questions
How Long Water Damage Restoration Takes Overall
Water damage restoration usually takes a few days to several weeks, depending on how much water got in and what it soaked into. Most projects move through the same stages: emergency response, inspection, extraction, drying, cleaning, material removal, and repairs. Each stage has its own timing, and the stages overlap less than many homeowners expect.
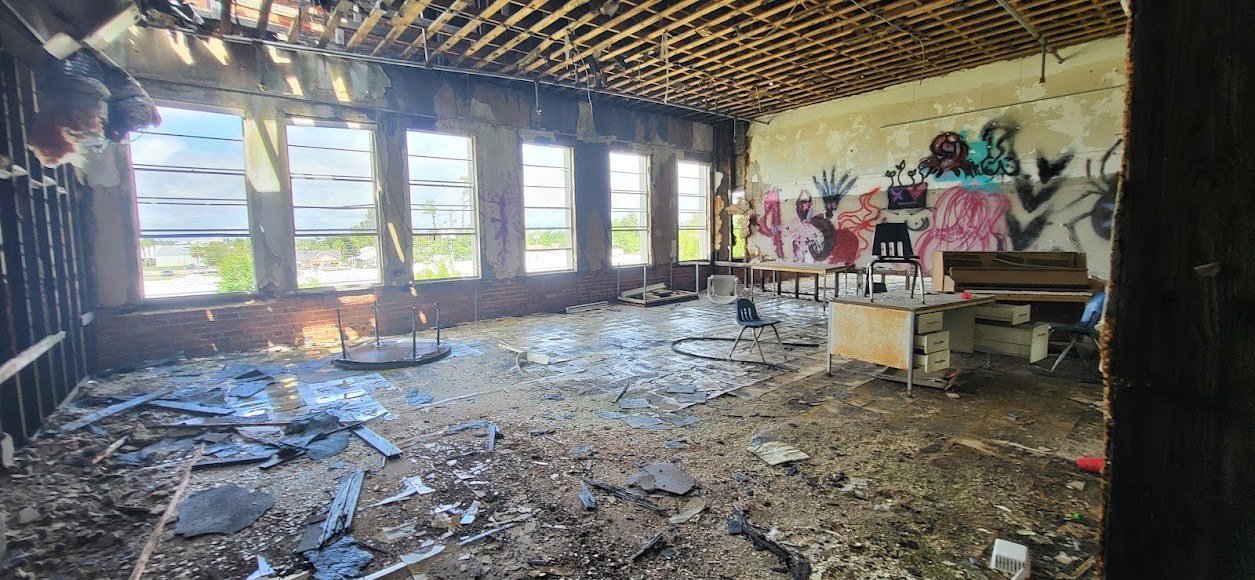
The most useful way to plan is to think of two separate clocks. The first is mitigation, which is the work that stops the damage from getting worse. The second is reconstruction, which is the work that restores the rooms to normal. Mitigation is usually short. Reconstruction often takes much longer.
- Mitigation: Stopping water, removing it, and drying the structure
- Reconstruction: Replacing drywall, flooring, cabinets, and finishes
- Waiting periods: Insurance review, material ordering, and inspections
Published estimates vary a lot. Drying timelines and repair timelines vary widely by project, so the specific schedule for your property should be confirmed with your restoration provider in writing. A small leak in one bathroom and a flood across a whole first floor will land in very different places on that scale.
If you are dealing with a water loss now, call Raven at 850-512-1109 for a quick read on what your timeline might look like. You can also review our flood damage and disaster restoration services for an overview of the full process.
Step 1: Emergency Response and Stopping the Water Source
The first hours matter most. Stopping the water source is the first job, because nothing else can start until the flow stops. That might mean shutting off a supply line, closing a main valve, or getting a roofing crew to cover an opening.
Speed here changes the whole timeline. Water that sits for 24 to 48 hours soaks deeper into drywall, subfloors, and insulation. That means more material has to come out later. Quick action usually keeps the project smaller.
Safety comes first. Turn off electricity to affected areas if water reaches outlets or the panel, and do not walk into standing water near live wiring. Once the source is controlled, document what you see with photos and videos before anything is moved.
Common mistakes at this stage include:
- Waiting to see if the water "dries on its own"
- Running fans before the water is removed
- Throwing out damaged items before they are photographed for insurance
Step 2: Initial Inspection, Damage Assessment and Moisture Mapping
Once the water is stopped, a technician inspects the property to find out how far the water traveled. This is where the timeline starts to take shape. The crew checks floors, walls, ceilings, cabinets, and the spaces behind baseboards and under flooring.
Moisture mapping is the core of this stage. Technicians use moisture meters and sometimes thermal imaging to find wet materials you cannot see. They record readings room by room. Those readings become the baseline for the drying plan and for the later check that shows the job is done.
The assessment also sorts the damage by material. Some items, like solid wood or ceramic tile, can often be dried in place. Others, like carpet pad, insulation, and certain drywall, may need removal. The more materials that must come out, the longer the reconstruction phase will run.
Water category matters too. Clean water from a supply line is handled differently than gray or black water from sewage or outside flooding. Contaminated water can require added cleaning and more removal, which can add time.
Step 3: Water Extraction, Cleaning and Structural Drying
Extraction removes standing water first, usually with pumps and wet vacuums. Once the visible water is gone, the crew moves to drying. Drying uses air movers and dehumidifiers to pull moisture out of the building materials and the air.
Drying takes time because moisture moves slowly out of dense materials. Air movers are placed to create airflow across wet surfaces, and dehumidifiers pull water vapor out of the room. Equipment often runs day and night. Equipment placement is adjusted as areas dry.
Cleaning and sanitizing happen alongside drying. Surfaces that were touched by floodwater or sewage need to be cleaned, and some items may need disinfection. This work does not usually add many days on its own, but it must be done before repairs begin.
Drying time depends on the building and the amount of water. Dense materials, hardwood, and wet insulation tend to take longer.
How Drying Completion Is Measured
Drying is not finished because the room feels dry, the paint looks normal, or the equipment has been running for a set number of days. It is finished when moisture readings inside the building materials return to a range that matches unaffected materials of the same type. That distinction is the single biggest reason homeowners are surprised by how long the drying phase runs. For a closer look at moisture checks and recovery steps, see our Panhandle water mitigation and dry-out planning.
The reference-point method. A technician establishes dry reference points before or during the job, a similar wall, a section of the same subfloor, or a framing member in a room the water never reached. Those unaffected readings become the target. Affected materials are then measured against that baseline rather than against a single generic number, because a 1940s plaster wall and a modern drywall partition hold moisture differently. When the affected readings sit close to the dry reference for the same material, the structure is considered ready for repairs.
What gets measured. Depending on the loss, technicians take readings with pin-type and pinless moisture meters on drywall, baseboards, studs, subfloor, joists, hardwood, and concrete. Thermal imaging is often used first to locate cooler, wetter areas behind finished surfaces, then meters confirm the actual moisture content. Readings are recorded room by room and by material, not as a single whole-house number.
Why equipment stays after surfaces feel dry. Air movers and dehumidifiers are typically pulled only after the readings pass, not when the carpet feels dry to the touch. Surface dryness happens long before the framing, subfloor, or wall cavity behind the baseboard is dry. Pulling equipment early lets moisture rebound into the assembly, which can restart the drying clock or create conditions for mold growth. Equipment is often left in place after visible surfaces feel dry, because hidden assemblies can take longer to dry.
The daily log. Crews typically record readings each day, note equipment placement and any changes, and adjust the drying plan as areas reach target. That running log is the record that shows progress and supports the completion decision. Ask for it at the end of drying, it shows which areas were tested, the starting readings, the daily trend, and the final readings compared to the dry reference.
If you are unsure whether a space is actually dry after a leak or storm intrusion, a mold assessment can establish whether hidden moisture remains before you rebuild over it. Raven offers free visual mold inspections; laboratory sampling and written reports are quoted separately.
Step 4: Material Removal, Repairs and Reconstruction Timelines
Material removal happens after drying has mapped out what can be saved and what cannot. Wet drywall, damaged insulation, soaked carpet pad, and warped flooring are common items to remove. Cutting out drywall is done in controlled sections so the wall structure can still be checked and dried.
Reconstruction is usually the longest part of the job. Drywall has to be hung, taped, and finished. Paint needs time to cure. Flooring, cabinets, and trim may need to be ordered, which can add days or weeks depending on supply. Electrical or plumbing repairs may require separate inspections.
Typical reconstruction timing depends on scope. A single damaged wall with small repairs might take a few days to a week. A full room rebuild with new flooring and cabinets can take several weeks. Whole-floor losses can run longer.
Reconstruction time depends on scope, materials availability, and the contractor's schedule, and actual dates should be confirmed in a written plan for your project.
When Mold Enters the Timeline: Mold Remediation Scheduling
Mold can begin to grow on damp materials, so slow drying is a real concern (the EPA). If mold is visible or the smell persists after drying, mold remediation may need to be added to the schedule. That adds its own steps, such as containment, removal of affected materials, cleaning, and clearance checks.
Remediation usually happens before the final reconstruction. Walls and framing may need to be cleaned or replaced before new drywall goes up. Scheduling this work early prevents rebuilding over a problem that will return.
If you suspect mold, start with a mold assessment to plan your next steps. A proper inspection tells you whether remediation is needed and how long it may take. You can also review our mold remediation services in the Florida Panhandle for details on how that work is scheduled.
Testing and assessment are separate from removal. Raven offers free visual mold inspections, while laboratory sampling and written reports are quoted separately. Knowing which you need helps you plan the timeline.
Factors That Lengthen or Shorten the Restoration Timeline
Most of the variance in a restoration timeline comes from a handful of factors that compound. Knowing which ones apply to your loss helps you set realistic expectations and push on the levers you actually control.
Water category and contamination. Clean water from a supply line is handled differently than gray water (appliance discharge, some sink backups) and black water (sewage, outside flooding). Contaminated water typically requires more material removal, added cleaning and disinfection, and sometimes containment, all of which extend the schedule. The category is set during inspection and can change the plan mid-job if the source turns out to be worse than first believed.
How long the water sat. Water that sits beyond roughly 24 to 48 hours soaks deeper into drywall, insulation, and subfloor. More material has to come out later, and drying takes longer because the moisture has spread further. Fast extraction is the single biggest lever a homeowner controls.
Materials involved. Carpet pad, insulation, and certain drywall usually come out. Solid wood, ceramic tile, and concrete often dry in place but take longer to release moisture. Dense assemblies, hardwood over plywood, thick subfloor, plaster, extend drying time compared with a single layer of drywall.
Hidden moisture and surprises during demolition. Opening a wall can reveal wet framing, an old leak, or mold that was not visible before. Each discovery adds scope, and scope additions add time. This is normal, but it is the reason a written schedule should include contingencies rather than a single finish date.
Insurance approval and documentation, the separate clock. Mitigation time and claim time are not the same thing, and conflating them is a common source of frustration. Mitigation can be complete while the claim is still being reviewed. Adjuster inspections, photo and moisture-log review, itemized scope approval, and coordination between the restoration provider and the carrier all happen on their own schedule. Missing photos, incomplete moisture logs, or an undocumented scope can send a claim back for more information and add days or weeks before reconstruction is authorized. Keeping records organized from day one, photos before anything is moved, daily moisture logs, itemized scope, is the most reliable way to shorten the claim side of the timeline. Coverage decisions, deductibles, and any uncovered amounts remain subject to the carrier's approval and the agreed written payment responsibilities.
Material ordering and trade scheduling. Reconstruction often waits on materials. Flooring, cabinets, and specialty finishes can be backordered, and electrical or plumbing work may require separate inspections before drywall closes up. A full room rebuild with new flooring and cabinets can take a meaningful amount of time once work starts, and ordering delays can add to that.
Factors that shorten the timeline:
- Fast emergency response and water removal before materials soak through
- A small, contained loss in one area
- Materials that dry in place without removal
- Clear, organized documentation that speeds insurance review
- Contractors and materials available without a long lead time
If you are planning around a loss and want to understand how assessment, removal, and documentation fit together, review our mold remediation services and contact us to talk through the sequence for your property.
The table below lists the main factors that can lengthen or shorten a restoration timeline, as described above.
| Factor | Effect on timeline | Why it matters |
|---|---|---|
| Water category | Adds time when contaminated | Gray or black water needs more removal and cleaning |
| Time water sat | Adds time when delayed | Water soaking 24-48 hours goes deeper into materials |
| Materials involved | Adds time when dense | Hardwood, plaster and thick subfloor take longer to dry |
| Hidden moisture found | Adds scope | Demolition can reveal wet framing or mold |
| Insurance documentation | Adds time when incomplete | Missing photos or moisture logs delay claim approval |
| Materials ordering | Adds time when backordered | Flooring and cabinets can add days or weeks |
| Fast water removal | Shortens timeline | Limits how far damage spreads into materials |
Planning Your Restoration Schedule and Next Steps
A realistic plan starts with the mitigation timeline, then adds reconstruction on top. Ask your restoration provider for a written schedule that shows each phase, the expected duration, and what could change it. Ask your provider about moisture documentation at the end of drying so you can understand when the structure is ready for repairs.
Keep copies of every photo, invoice, and report. Those records support your insurance claim and help any future contractor understand what was done. If a phase runs longer than expected, ask why. A good provider will explain the reason in plain terms.
If you have water damage or suspect hidden moisture, reach out to Raven Environmental Restoration Services at 850-512-1109. Our team can explain the stages, what they mean for your property, and what to expect next. Email admin@ravenenviro.com for non-urgent questions.
Frequently Asked Questions
How long does it take to repair a water damaged ceiling?
Repair time for a water-damaged ceiling depends on whether the drywall or plaster is saturated, sagging or stained, and on how long the area stayed wet. Once the ceiling is confirmed dry, repairs such as patching, texturing and painting can proceed. If insulation must be replaced or the drywall must be cut out and replaced, the work takes longer, and drying time must be completed first. Insurance review can add delay, so keep documentation of the damage.
How long does it take for water damage to turn to mold?
Mold can begin growing on wet building materials, and the exact time varies with temperature, humidity and the material involved. This is why fast drying matters. Wet drywall, carpet pad and wood framing that remain damp for extended periods are the most likely to support growth. If visible mold or a musty odor appears, have the area assessed before rebuilding.
What is the typical timeline for mold remediation?
Mold remediation timelines depend on the size of the affected area, the materials involved and whether containment is needed. Timelines depend on the size of the affected area and the materials involved, and larger projects that require removal of drywall, insulation or flooring take longer. Testing or a written assessment, where applicable, is scheduled after cleaning and drying are complete. Remediation and testing are quoted separately, so request a written scope before work begins.
How soon should water damage restoration begin?
Water damage restoration should begin as soon as it is safe to do so. Early action limits the spread of water into subfloors and wall cavities and reduces the risk of mold. Stop the water source first, then document the damage with photos before anything is moved or removed. Call a restoration contractor and keep records of every visit, since those records support insurance claims.
